Looking for Help?
Find answers to your questions
-
Adventurer 5M Series
- FAQ for Adventurer 5M Pro
- FAQ for Adventurer 5M
- Unboxing Your Adventurer 5M Pro
- Adventurer 5M Series Firmware Update Log
- Firmware Upgrade
- Troubleshooting: Network-related Issues
- Troubleshooting: Equipment Error Messages
- AD5M Series Troubleshooting: Equipment Hardware Issues
- AD5M Series Troubleshooting: Print Quality Problems
- Troubleshooting: Equipment Usage Issues
- Basic Setup
- Accessories List
- Unboxing Your Adventurer 5M
- Introduction to Adventurer 5M Series
- FAQ for Guider 3 Ultra
- Perform a firmware update on Guider 3 Ultra
- Firmware release note
- Troubleshooting for Guider 3 Ultra
- Basic setup
- Accessories list
- Unboxing your Guider 3 Ultra
- Introduction to Guider 3 Ultra
- AD5X Firmware Upgrade
- Print Without IFS
- Print via Orca-Flashforge
- Print Models from a USB Flash Drive on AD5X
- Print Built-in Models on AD5X
- Change Filament on AD5X
- Loading Filament
- AD5X Printing on the Build Plate
- AD5X Preparation before Printing
- Refill Printing
- Automatic filament loading
- Multi-Color Printing
- Connecting IFS to AD5X
- AD5X Basic Setup
- Accessories List for AD5X
- Quick-start Guide for Your AD5X
- Unboxing Your AD5X
- Introduction to AD5X
- Print Built-in Models on Adventurer 5M Series
- Preparation before Printing
- Printing on the Build Plate
- Creative Designs from our Users
- Test print models for HS PLA (print with ad5m series)
- From 0 to 250: The Rise of a 3D Print Farm
- How to Series Video on Youtube
- AD5M Series Slicing Profile
- Maker Series Video on Youtube
- Page Contents
- Printer Mod and DIY
AD5M Series Troubleshooting: Print Quality Problems
Table of Contents
1. Under-extrusion During Printing
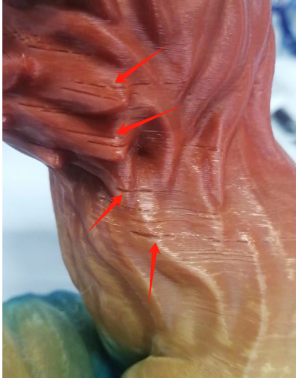
Cause 1: Impurities in the filament or mismatch between the model printing temperature and filament temperature
Solution:
- Replace the filament with a new one.
- Set the correct printing temperature based on the recommended temperature indicated on the filament box.
Cause 2: Carbonized filament buildup on the nozzle
Issue: During manual filament feeding, the extruded filament diameter is less than 0.45mm. The normal diameter shall be around 0.5±0.03mm.
Solution: Replace the nozzle.
2. Layer Lines on 3D Prints
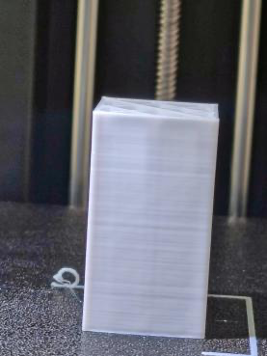
Cause 1: Z-axis movement is not smooth.
Issue: Abnormal noise or jamming during Z-axis up-and-down movement.
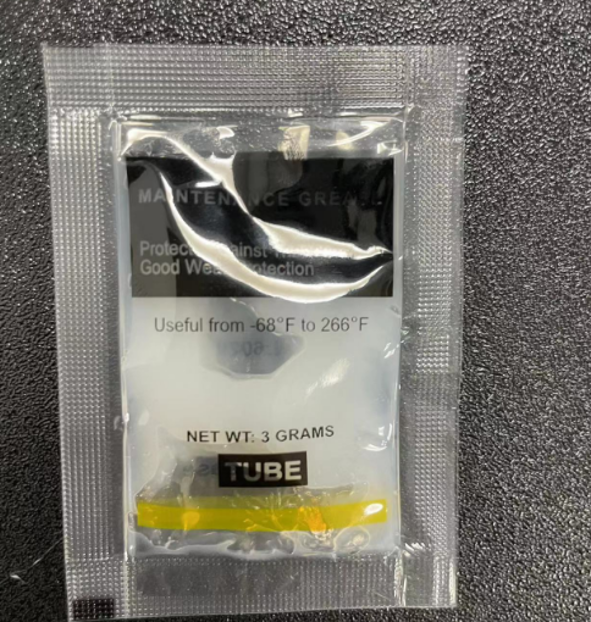
Solution: Apply grease to the Z-axis lead screw.
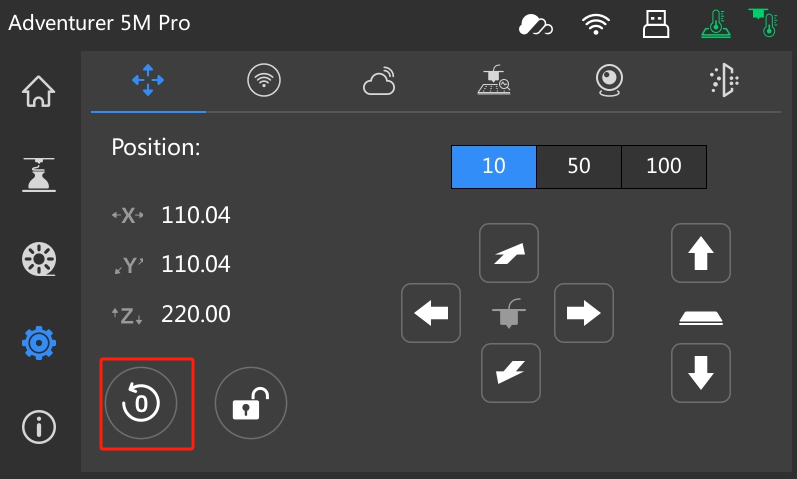
- Step 1: Open the grease and home XYZ.
 |
 |
- Step 2: Apply grease to the Z-axis lead screw, ensuring even coverage.
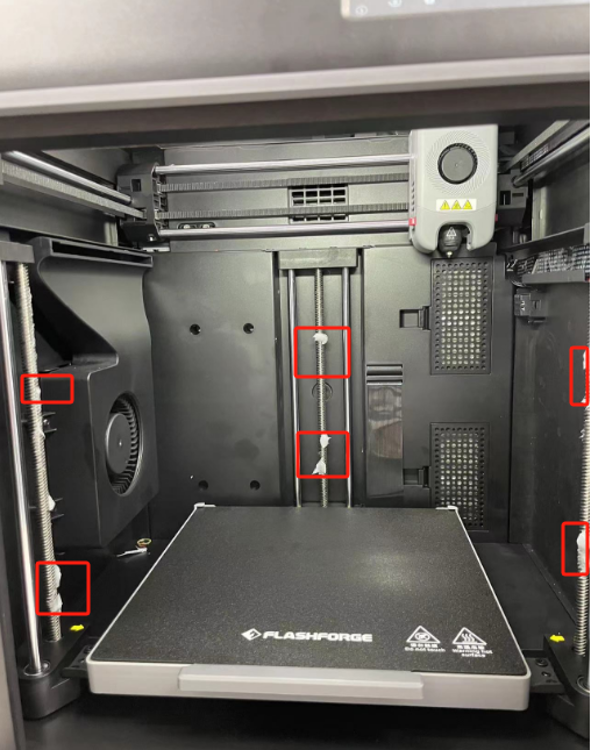
- Step 3: Click to raise the bed (select 100 by clicking twice).
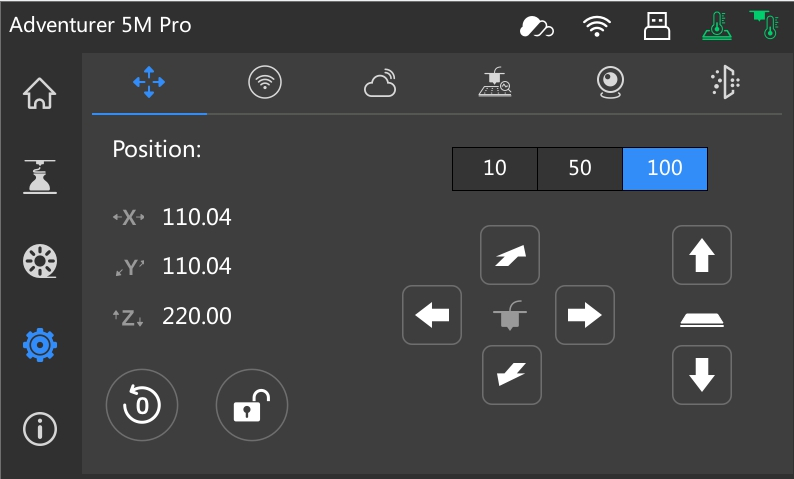
- Step 4: Apply grease under the bed.
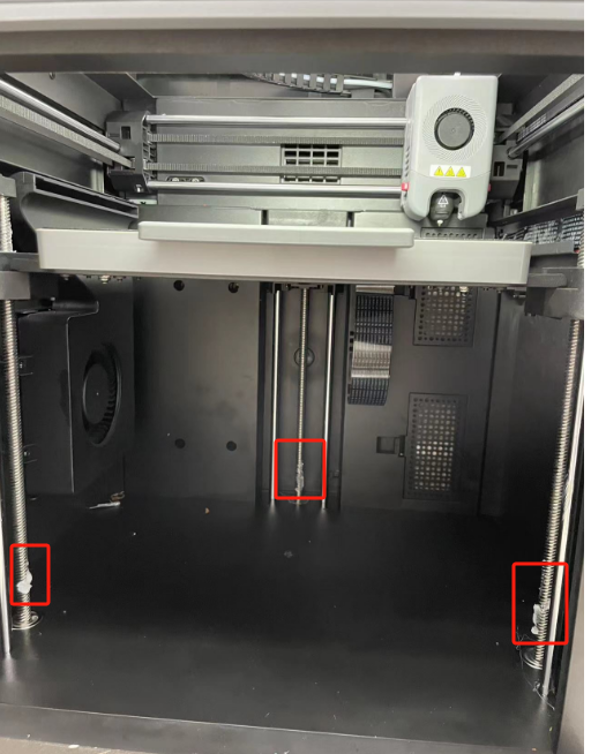
- Step 5: Click the homing button to evenly distribute the grease on the entire lead screw. Move up and down several times.
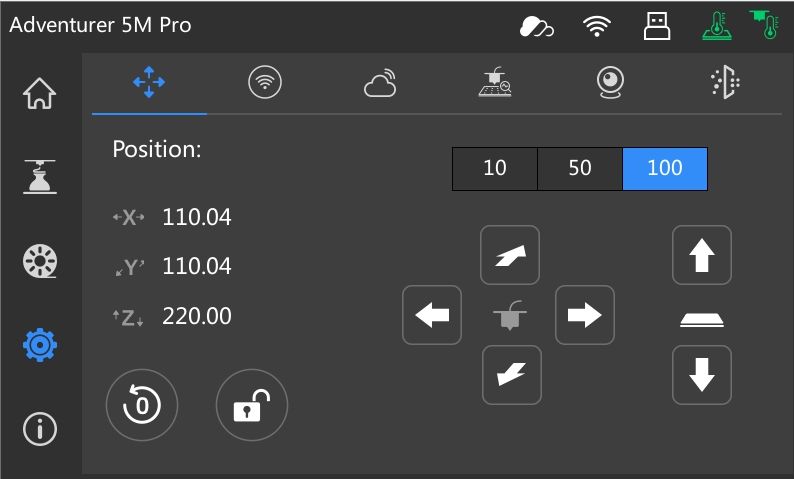
3. Ghosting & Ringing
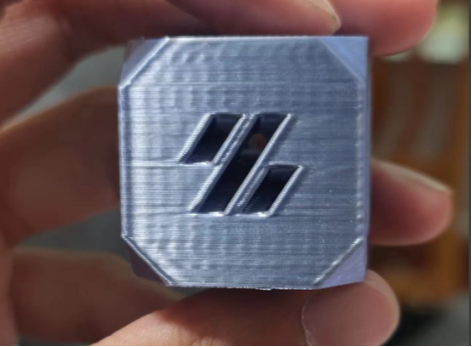
Cause1: Insufficient belt tension
Solution 1:
- Step 1: Retighten the belt.
- Step 2: Perform calibration and vibration compensation again.
Solution 2:
- Reduce the acceleration using OrcaSlicer via Speed → Acceleration → Normal printing.
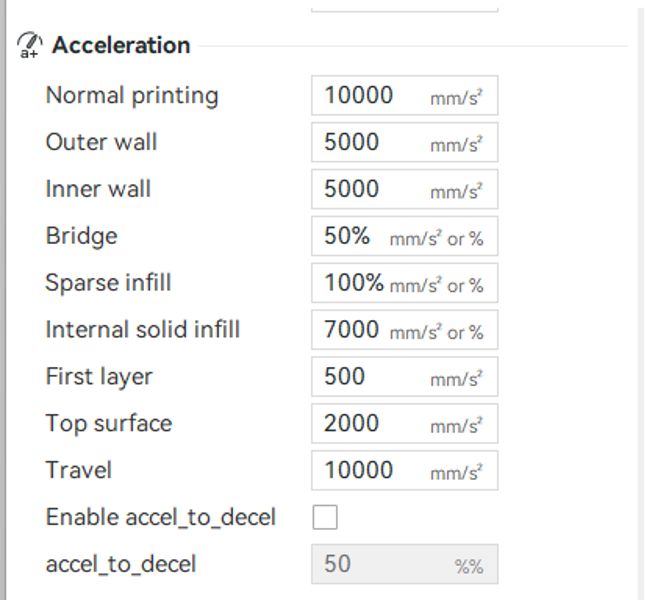
4. Droopy Overhangs
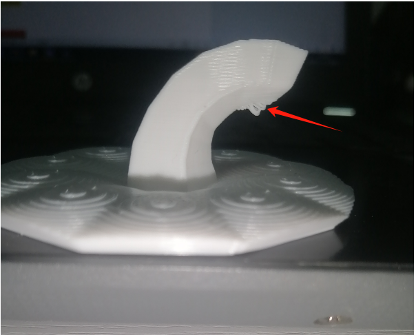
Cause 1: Overhangs at large angles
Solution 1: Enable “Slow down for overhangs” in OrcaSlicer.
Solution 2: Add supports for overhangs at an angle greater than 30°.
Solution 3: Increase the cooling fan layer time and reduce the minimum print speed in OrcaSlicer.
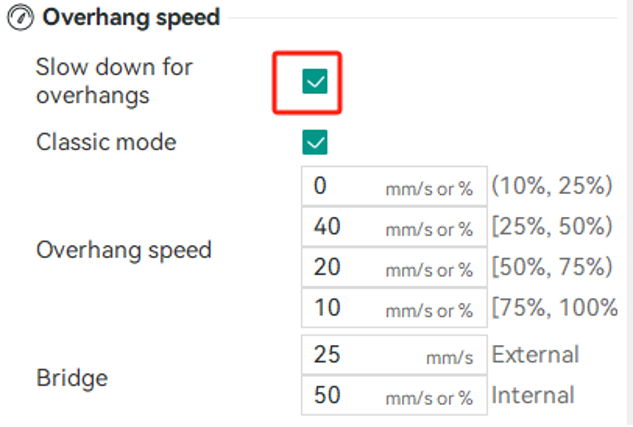
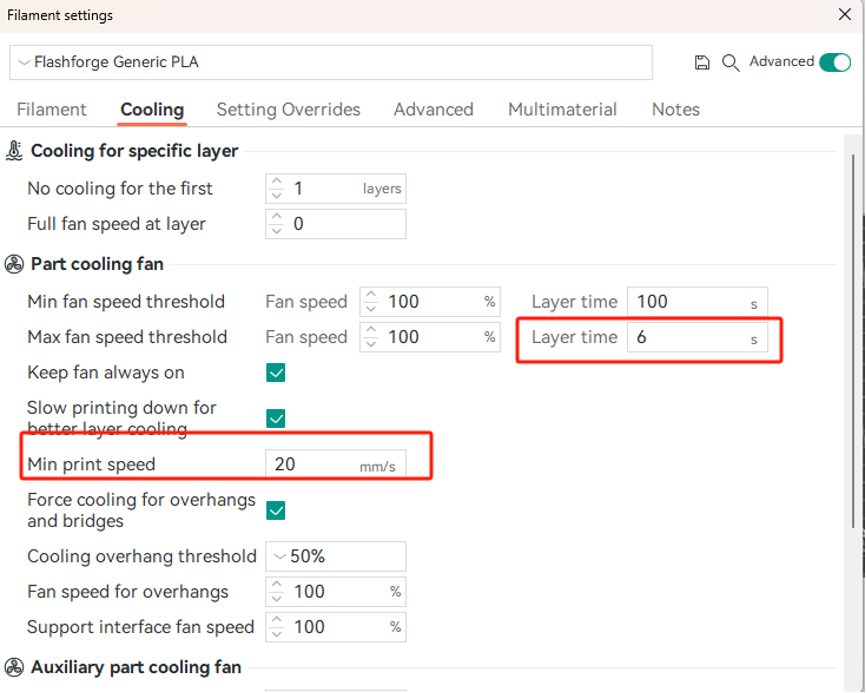
Cause 2: Malfunctioning cooling fan and auxiliary fan
Solution: Please refer to the video for instructions on [replacing the cooling fan and turbo fan](/en/adventurer-series/maintenance/ad5mseries-replace-the-turbo-fan-and-cooling-fan =650x).
5. Stringing
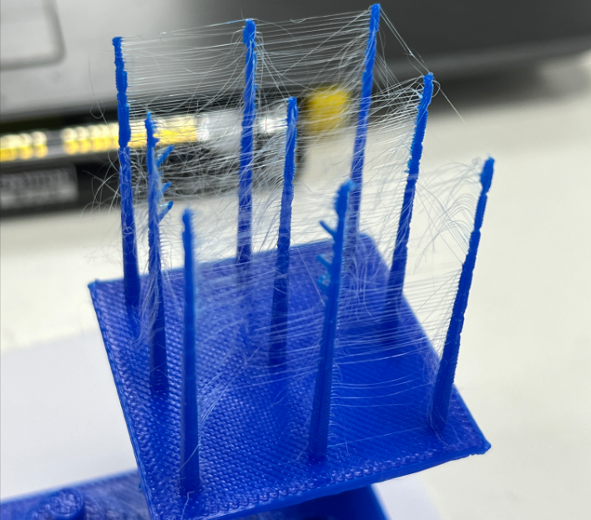
Cause 1: Filament that has absorbed moisture can become brittle and prone to breaking (especially for PLA, PETG, and ABS).
Solution : Dry or replace it with a newly unpacked filament.
Cause 2: Insufficient retraction
Solution: Use OrcaSlicer to increase the retraction amount and retraction speed appropriately, and enable “Retract on layer change” and “Wipe while retracting”.
Cause 3: Incorrect temperature setting
Solution: Adjust the extruder temperature.
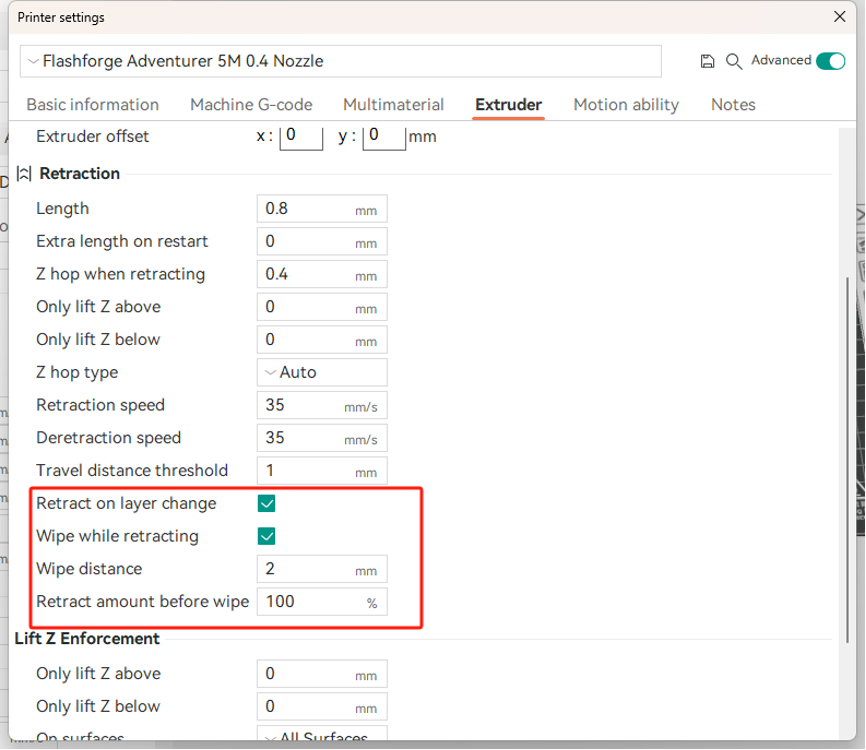
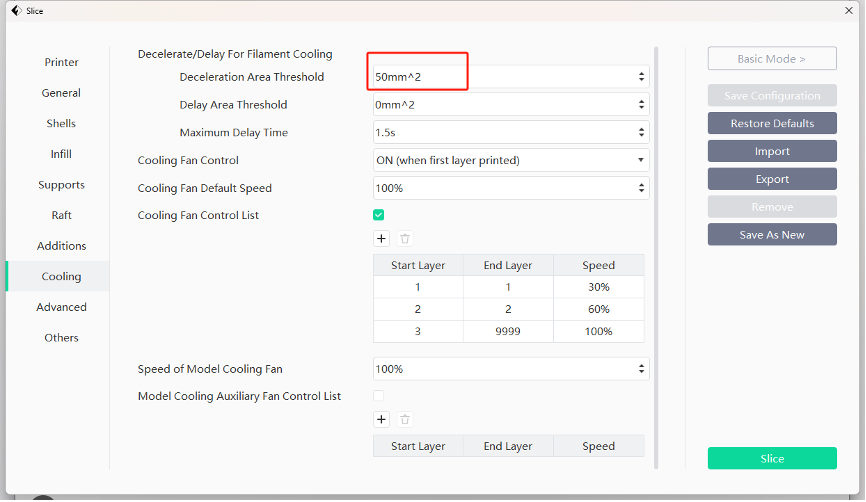
6. Roughness is Observed in Small Areas When Sliced Using FlashPrint5
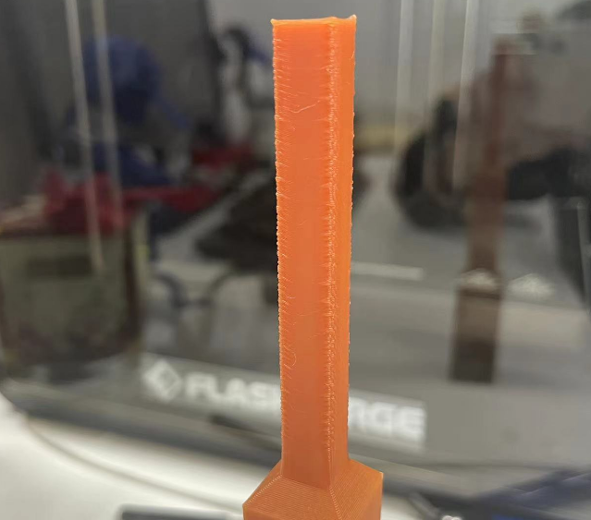
Cause: Model printing speed too fast, insufficient cooling
Solution 1: Reduce the print speed in the slicer.
Solution 2: Adjust the “Deceleration Area Threshold” in the slicer to make the printer automatically slow down for smaller areas of the model.
Updated on 31 Aug 2024
What are your Feelings?
Thanks for your feedback
Newsletter
Promotions, new products and sales. Directly to your inbox.

Free shipping
Available for shipping within the continental United States.

12-years Brand
Trusted by over 1 million users worldwide.

Secure payment
Pay securely with Credit Card, PayPal, Klarna, and Afterpay.

Points & Rewards
Just 100 points = 5% off on filaments and accessories.


