Looking for Help?
Find answers to your questions
-
Adventurer 5M Series
- FAQ for Adventurer 5M Pro
- FAQ for Adventurer 5M
- Unboxing Your Adventurer 5M Pro
- Adventurer 5M Series Firmware Update Log
- Firmware Upgrade
- Troubleshooting: Network-related Issues
- Troubleshooting: Equipment Error Messages
- AD5M Series Troubleshooting: Equipment Hardware Issues
- AD5M Series Troubleshooting: Print Quality Problems
- Troubleshooting: Equipment Usage Issues
- Basic Setup
- Accessories List
- Unboxing Your Adventurer 5M
- Introduction to Adventurer 5M Series
- FAQ for Guider 3 Ultra
- Perform a firmware update on Guider 3 Ultra
- Firmware release note
- Troubleshooting for Guider 3 Ultra
- Basic setup
- Accessories list
- Unboxing your Guider 3 Ultra
- Introduction to Guider 3 Ultra
- AD5X Firmware Upgrade
- Print Without IFS
- Print via Orca-Flashforge
- Print Models from a USB Flash Drive on AD5X
- Print Built-in Models on AD5X
- Change Filament on AD5X
- Loading Filament
- AD5X Printing on the Build Plate
- AD5X Preparation before Printing
- Refill Printing
- Automatic filament loading
- Multi-Color Printing
- Connecting IFS to AD5X
- AD5X Basic Setup
- Accessories List for AD5X
- Quick-start Guide for Your AD5X
- Unboxing Your AD5X
- Introduction to AD5X
- Print Built-in Models on Adventurer 5M Series
- Preparation before Printing
- Printing on the Build Plate
- Creative Designs from our Users
- Test print models for HS PLA (print with ad5m series)
- From 0 to 250: The Rise of a 3D Print Farm
- How to Series Video on Youtube
- AD5M Series Slicing Profile
- Maker Series Video on Youtube
- Page Contents
- Printer Mod and DIY
Basic setup
Table of Contents
Change Printer Name on Guider 3 Ultra
1. On the main interface, click [![]() ].
].
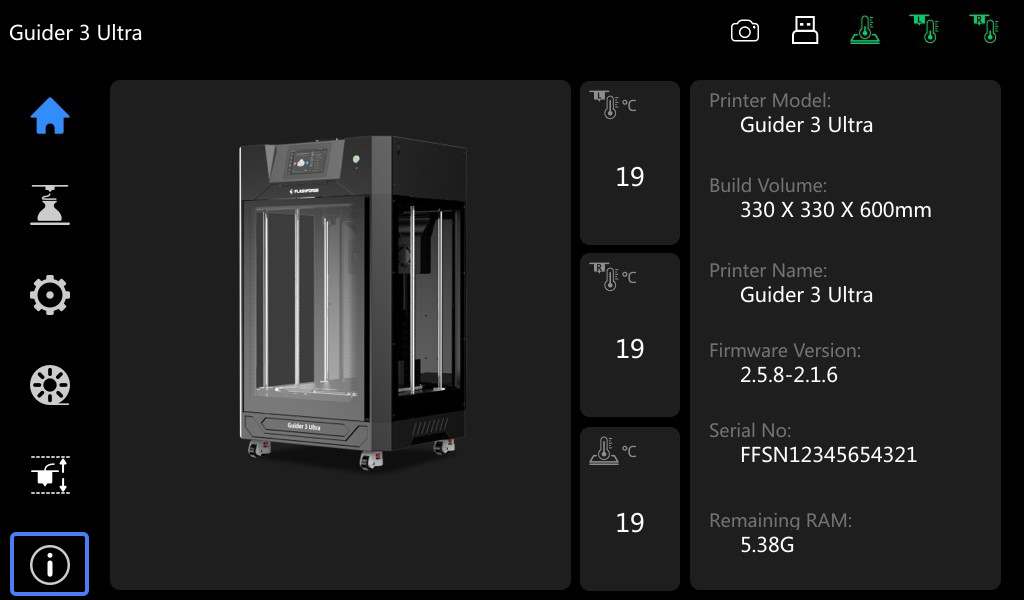
2. On the info interface, click [Name].
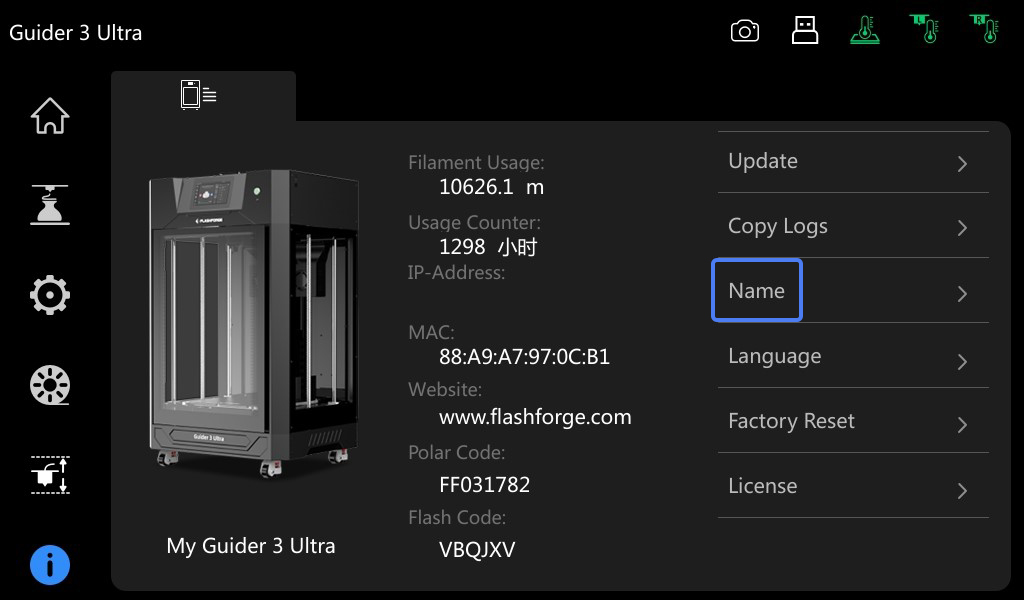
3. Enter the desired printer name, and then click [Ok].
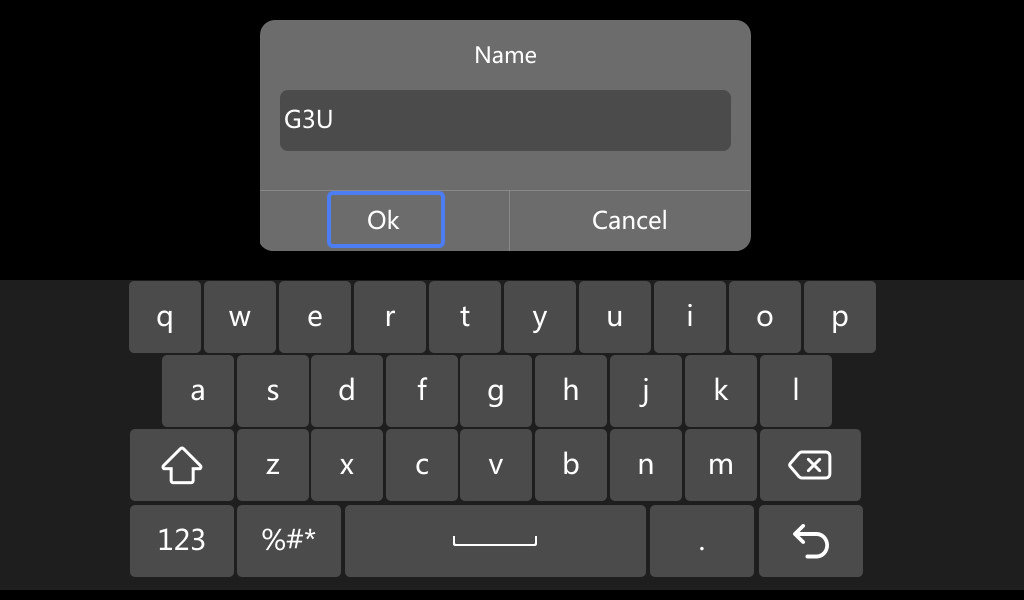
4. As shown in the figure, the printer name is changed successfully.

Change Language on Guider 3 Ultra
1. On the main interface, click [![]() ].
].

2. On the info interface, click [Language].
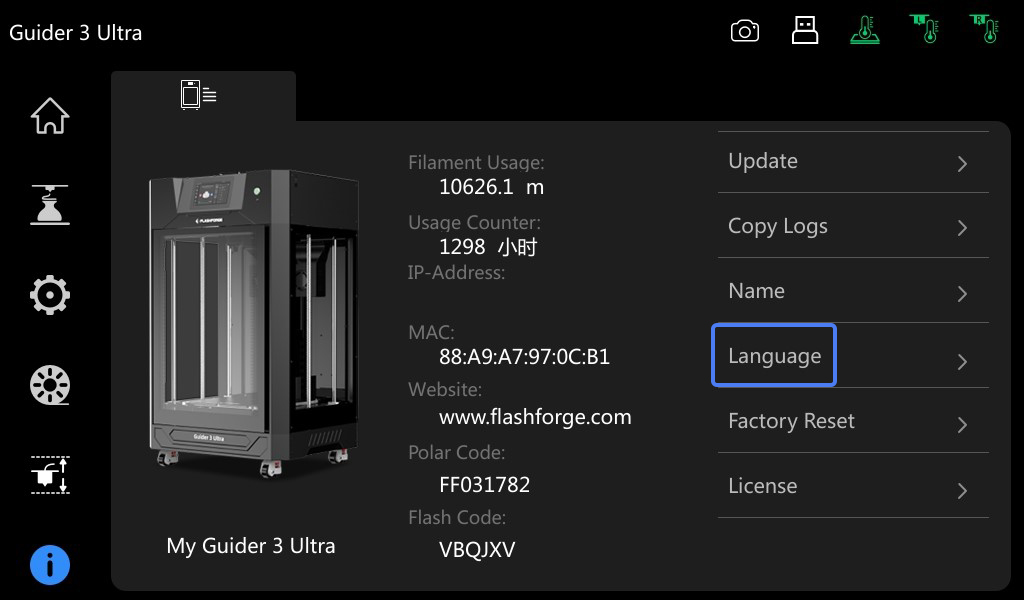
3. Select the desired language.

4. As shown in the figure, the language is changed successfully.
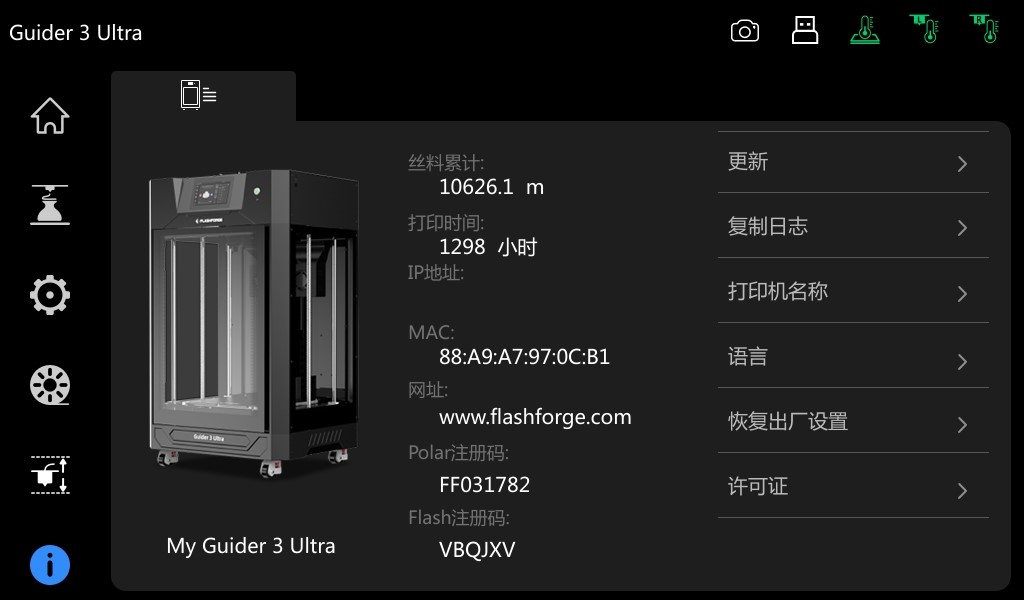
Factory Reset Guider 3 Ultra
1. On the main interface, click [![]() ].
].

2. On the info interface, click [Factory Reset].

3. After the prompt pops up, click [Yes].
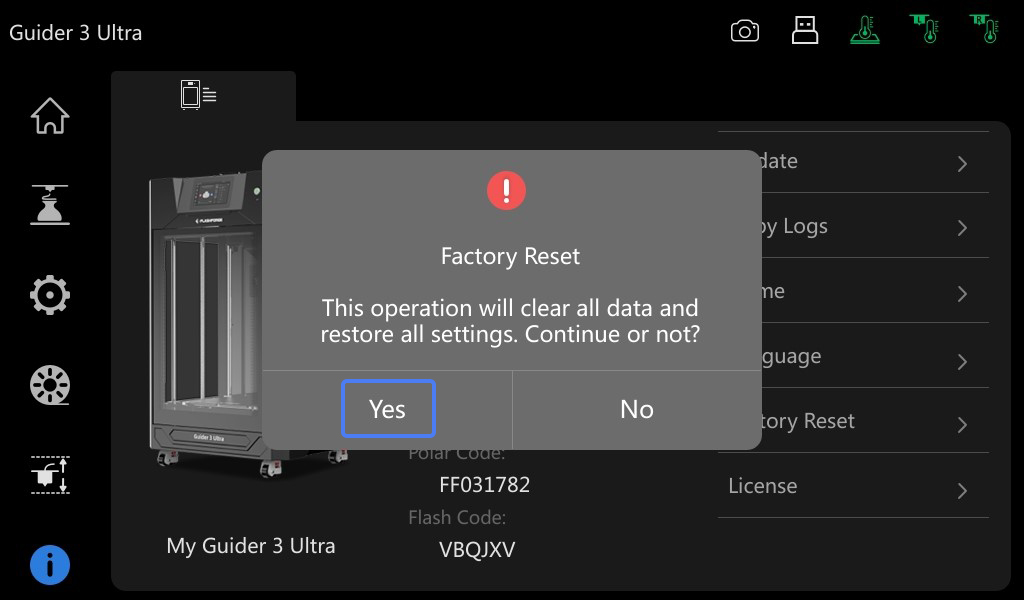
Note: After the factory reset of Guider 3 Ultra, it will clear FlashCloud and Polar Cloud registration codes, disable the filament detection switch, reset the camera and auto-leveling switch. It will enter boot guide after restart.
Updated on 31 Aug 2024
What are your Feelings?
Thanks for your feedback
Newsletter
Promotions, new products and sales. Directly to your inbox.

Free shipping
Available for shipping within the continental United States.

12-years Brand
Trusted by over 1 million users worldwide.

Secure payment
Pay securely with Credit Card, PayPal, Klarna, and Afterpay.

Points & Rewards
Just 100 points = 5% off on filaments and accessories.


