Looking for Help?
Find answers to your questions
-
Adventurer 5M Series
- FAQ for Adventurer 5M Pro
- FAQ for Adventurer 5M
- Unboxing Your Adventurer 5M Pro
- Adventurer 5M Series Firmware Update Log
- Firmware Upgrade
- Troubleshooting: Network-related Issues
- Troubleshooting: Equipment Error Messages
- AD5M Series Troubleshooting: Equipment Hardware Issues
- AD5M Series Troubleshooting: Print Quality Problems
- Troubleshooting: Equipment Usage Issues
- Basic Setup
- Accessories List
- Unboxing Your Adventurer 5M
- Introduction to Adventurer 5M Series
- FAQ for Guider 3 Ultra
- Perform a firmware update on Guider 3 Ultra
- Firmware release note
- Troubleshooting for Guider 3 Ultra
- Basic setup
- Accessories list
- Unboxing your Guider 3 Ultra
- Introduction to Guider 3 Ultra
- AD5X Firmware Upgrade
- Print Without IFS
- Print via Orca-Flashforge
- Print Models from a USB Flash Drive on AD5X
- Print Built-in Models on AD5X
- Change Filament on AD5X
- Loading Filament
- AD5X Printing on the Build Plate
- AD5X Preparation before Printing
- Refill Printing
- Automatic filament loading
- Multi-Color Printing
- Connecting IFS to AD5X
- AD5X Basic Setup
- Accessories List for AD5X
- Quick-start Guide for Your AD5X
- Unboxing Your AD5X
- Introduction to AD5X
- Print Built-in Models on Adventurer 5M Series
- Preparation before Printing
- Printing on the Build Plate
- Creative Designs from our Users
- Test print models for HS PLA (print with ad5m series)
- From 0 to 250: The Rise of a 3D Print Farm
- How to Series Video on Youtube
- AD5M Series Slicing Profile
- Maker Series Video on Youtube
- Page Contents
- Printer Mod and DIY
Table of Contents
- 1. "Abnormal calibration data" pops up after Z-axis calibration.
- 2. Upon booting into the main interface, the printer shuts down automatically.
- 3. Error reported: X-Axis go home error.
- 4. Nozzle not heating during preheating.
- 5. Filament detection failure.
- 6. Dual-color printed models are of poor quality.
Troubleshooting for Guider 3 Ultra
Table of Contents
- 1. "Abnormal calibration data" pops up after Z-axis calibration.
- 2. Upon booting into the main interface, the printer shuts down automatically.
- 3. Error reported: X-Axis go home error.
- 4. Nozzle not heating during preheating.
- 5. Filament detection failure.
- 6. Dual-color printed models are of poor quality.
1. "Abnormal calibration data" pops up after Z-axis calibration.

Cause: This could be due to debris in the nozzle, foreign objects on the flexible steel sheet, improper installation of the flexible steel sheet, foreign objects between the platform and the flexible steel sheet, or a damaged electronic scale PCB.
Solution:
Step 1: Check sequentially for debris in the nozzle, foreign objects on the flexible steel sheet, improper installation of the flexible steel sheet, and foreign objects between the platform and the flexible steel sheet. Once all these areas are confirmed to be clear with no issues, please perform Z-axis calibration again following prompts.
Step 2: If the error persists after multiple attempts at Z-axis calibration, please contact customer support for replacing the electronic scale PCB (please refer to G3U-replace-PCB for guidance).
2. Upon booting into the main interface, the printer shuts down automatically.
After normal startup, the screen displays the main interface, but after a few seconds, the screen goes black and the printer shuts down automatically.
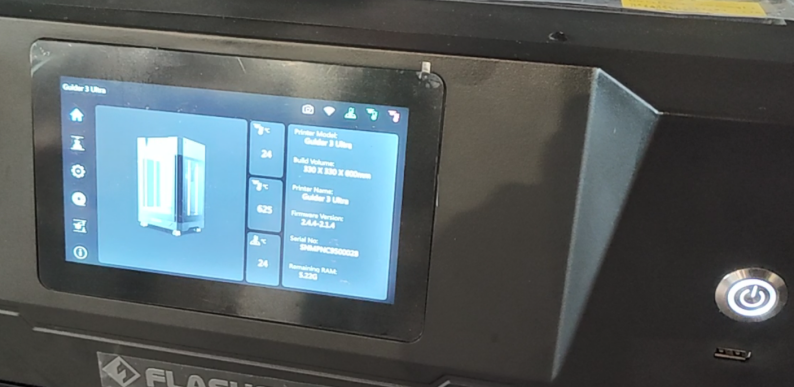
Cause: Anomalies in the contact of the relevant circuit of the thermocouple cause the printer to enter temperature protection mode and shut down automatically.
Solution:
Step 1: Please contact customer support to replace the extruder cable (please refer to G3U-replace-extruder-cable for guidance).
3. Error reported: X-Axis go home error.
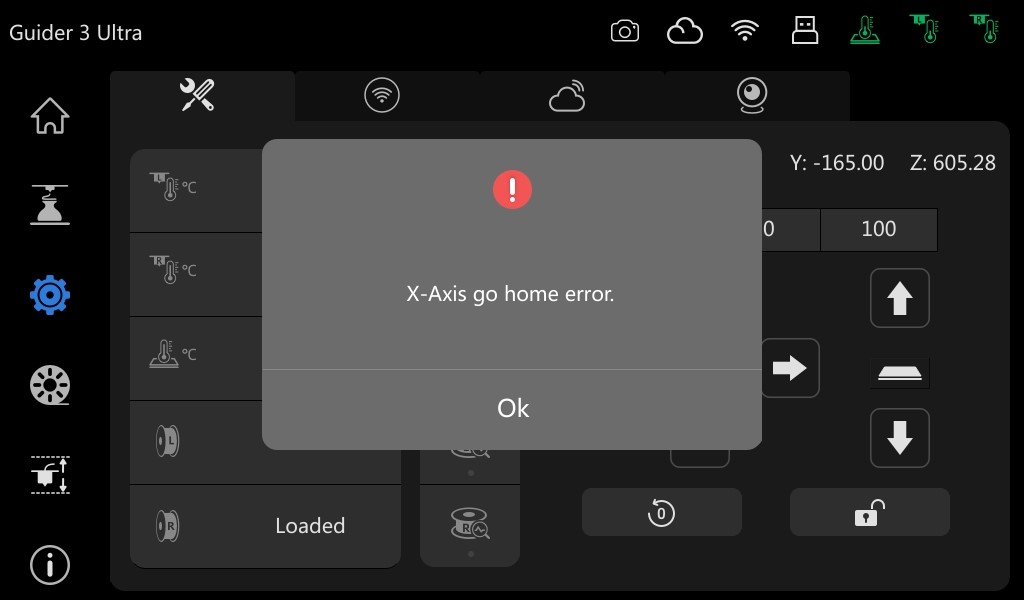
Cause: Foreign object at X-axis sensor/X-axis sensor damaged
Solution:
Step 1: Check if there is any obstruction at the X-axis sensor. If so, clear it and restart the printer to perform homing again. If there is no obstruction, simply restart the printer and perform homing again.

Step 2: If the error persists after performing Step 1, it is likely the sensor is damaged. Please contact customer support to replace the X-axis sensor (please refer to G3U-replace-Xaxis-sensor for guidance)
4. Nozzle not heating during preheating.
During preheating or printing, the extruder is unable to heat; the temperature does not increase.
Cause: Internal program anomaly or program entering temperature protection mode/hot end damaged/extruder adapter board damaged.
Solution:
Step 1: Restart the printer and attempt to heat the hot end again.
Step 2: If Step 1 fails, swap the hot ends on the left and right sides (please refer to G3U-replace-heating-element for guidance).
If the non-heating issue occurs on the other extruder after swapping, it indicates the hot end is damaged. Please contact customer support to replace the hot end (please refer to G3U-replace-heating-element for guidance).
If the non-heating issue persists with the same extruder, it indicates the extruder adapter board is damaged. Please contact customer support to replace the extruder adapter board (please refer to G3U-replace-extruder-adapter-board for guidance).
5. Filament detection failure.
Issue 1: With filament detection function enabled, printing continues even after filament runs out until the model is completed.
Issue 2: Filament loaded, but the printer keeps prompting filament is not loaded.
Cause: Filament detector damaged
Solution:
Step 1: Please contact customer support to replace the damaged filament detector (please refer to G3U-replace-filament-detector for guidance).
6. Dual-color printed models are of poor quality.
Poor model quality under the dual-color printing mode, including stringing and colors messing up issues.
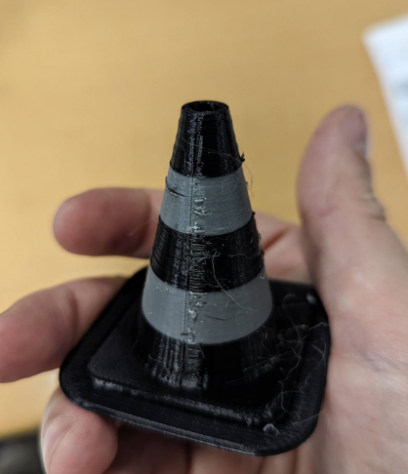
Cause: Filament humidity too high
Solution:
Step 1: Take out the filament and dry it according to the recommended drying temperature and time provided by the filament manufacturer.
Step 2: Place the dried filament back into the Guider 3 Ultra's filament chamber and replace the desiccant in the chamber.
Step 3: Monitor the digital hygrometer in the filament chamber. Once the displayed humidity drops below 15%, print the dual-color model again.
Step 4: If the issues of stringing and colors messing up persist after performing the above steps, please contact customer support.
Updated on 03 Sep 2024
What are your Feelings?
Thanks for your feedback
Newsletter
Promotions, new products and sales. Directly to your inbox.

Free shipping
Available for shipping within the continental United States.

12-years Brand
Trusted by over 1 million users worldwide.

Secure payment
Pay securely with Credit Card, PayPal, Klarna, and Afterpay.

Points & Rewards
Just 100 points = 5% off on filaments and accessories.


