Looking for Help?
Find answers to your questions
-
Adventurer 5M Series
- FAQ for Adventurer 5M Pro
- FAQ for Adventurer 5M
- Unboxing Your Adventurer 5M Pro
- Adventurer 5M Series Firmware Update Log
- Firmware Upgrade
- Troubleshooting: Network-related Issues
- Troubleshooting: Equipment Error Messages
- AD5M Series Troubleshooting: Equipment Hardware Issues
- AD5M Series Troubleshooting: Print Quality Problems
- Troubleshooting: Equipment Usage Issues
- Basic Setup
- Accessories List
- Unboxing Your Adventurer 5M
- Introduction to Adventurer 5M Series
- FAQ for Guider 3 Ultra
- Perform a firmware update on Guider 3 Ultra
- Firmware release note
- Troubleshooting for Guider 3 Ultra
- Basic setup
- Accessories list
- Unboxing your Guider 3 Ultra
- Introduction to Guider 3 Ultra
- AD5X Firmware Upgrade
- Print Without IFS
- Print via Orca-Flashforge
- Print Models from a USB Flash Drive on AD5X
- Print Built-in Models on AD5X
- Change Filament on AD5X
- Loading Filament
- AD5X Printing on the Build Plate
- AD5X Preparation before Printing
- Refill Printing
- Automatic filament loading
- Multi-Color Printing
- Connecting IFS to AD5X
- AD5X Basic Setup
- Accessories List for AD5X
- Quick-start Guide for Your AD5X
- Unboxing Your AD5X
- Introduction to AD5X
- Print Built-in Models on Adventurer 5M Series
- Preparation before Printing
- Printing on the Build Plate
- Creative Designs from our Users
- Test print models for HS PLA (print with ad5m series)
- From 0 to 250: The Rise of a 3D Print Farm
- How to Series Video on Youtube
- AD5M Series Slicing Profile
- Maker Series Video on Youtube
- Page Contents
- Printer Mod and DIY
How to Use FlashPrint
When using FlashPrint 5 for the first time, simply select the corresponding printer type to quickly access the software.
You can quickly find the sample models in STL format we have prepared for you via [File] - [Examples]; for example, a small cube is shown below.
If you want to quickly slice a model in STL format into a format recognizable by the printer, first ensure the printer type at the bottom left of the interface is correct (if incorrect, click [Machine Type] at the bottom left to choose the right one), click [Start Slicing] and then select the nozzle size and material type for rapid slicing.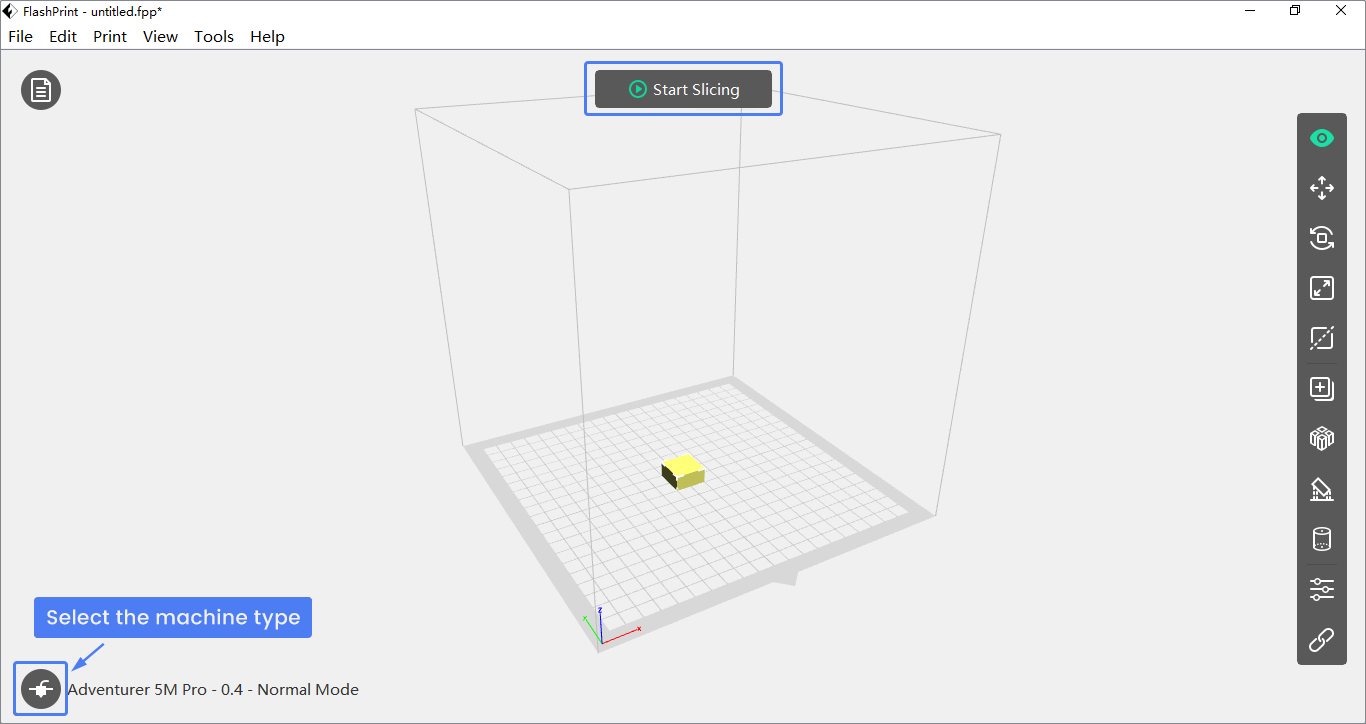

After finishing slicing, there are two ways to print the model.
1. Export the model to a USB flash drive and plug it into the printer's USB port for direct printing.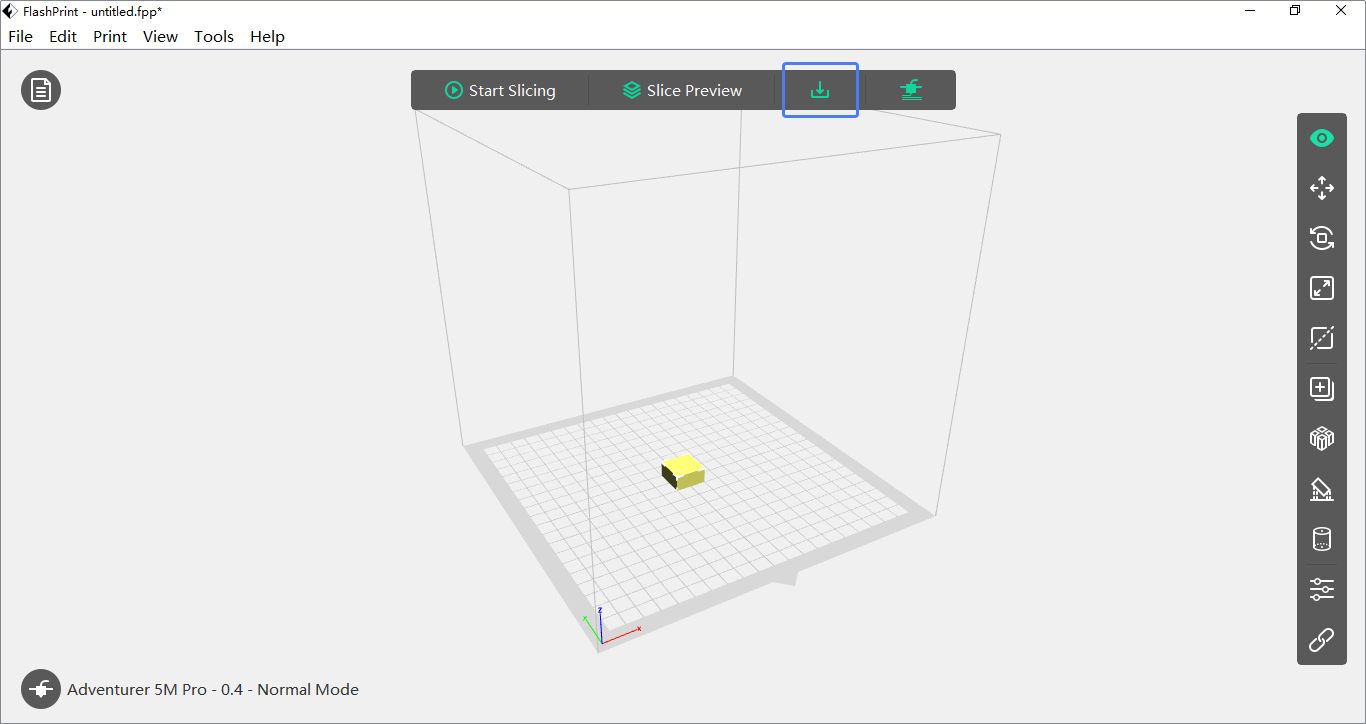
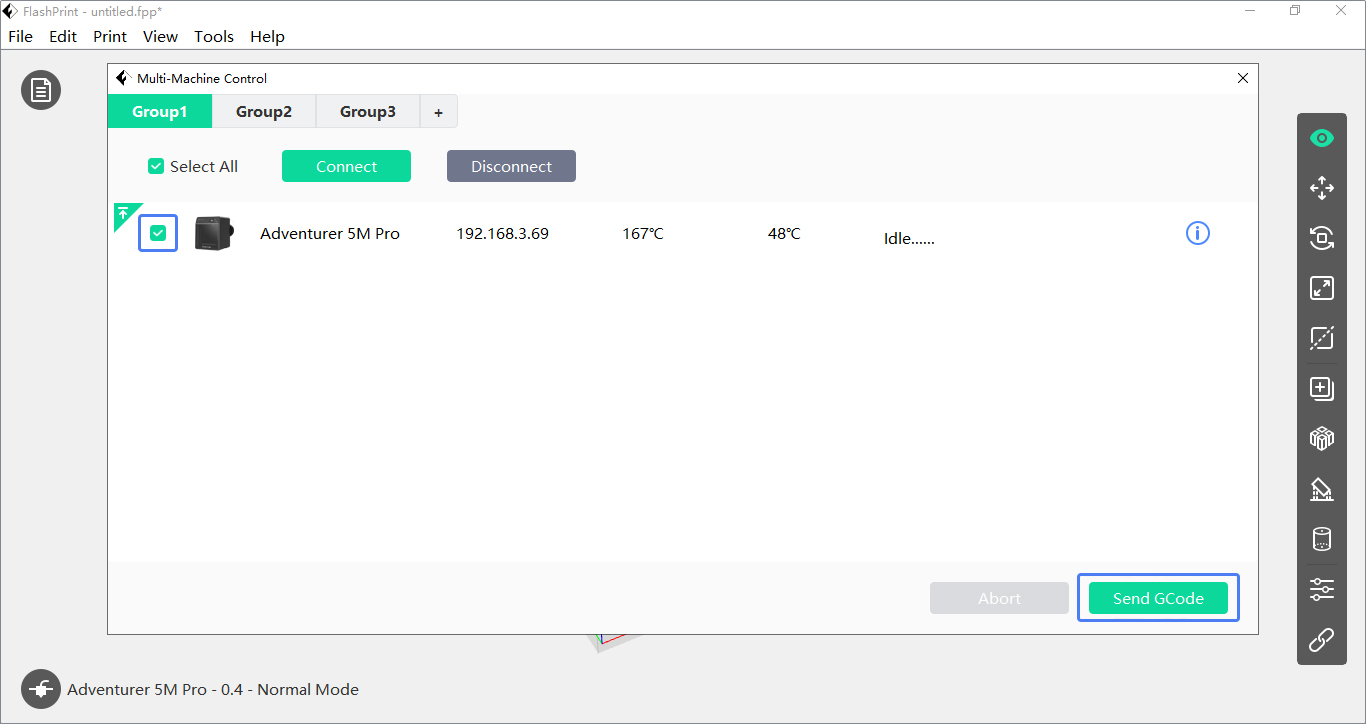
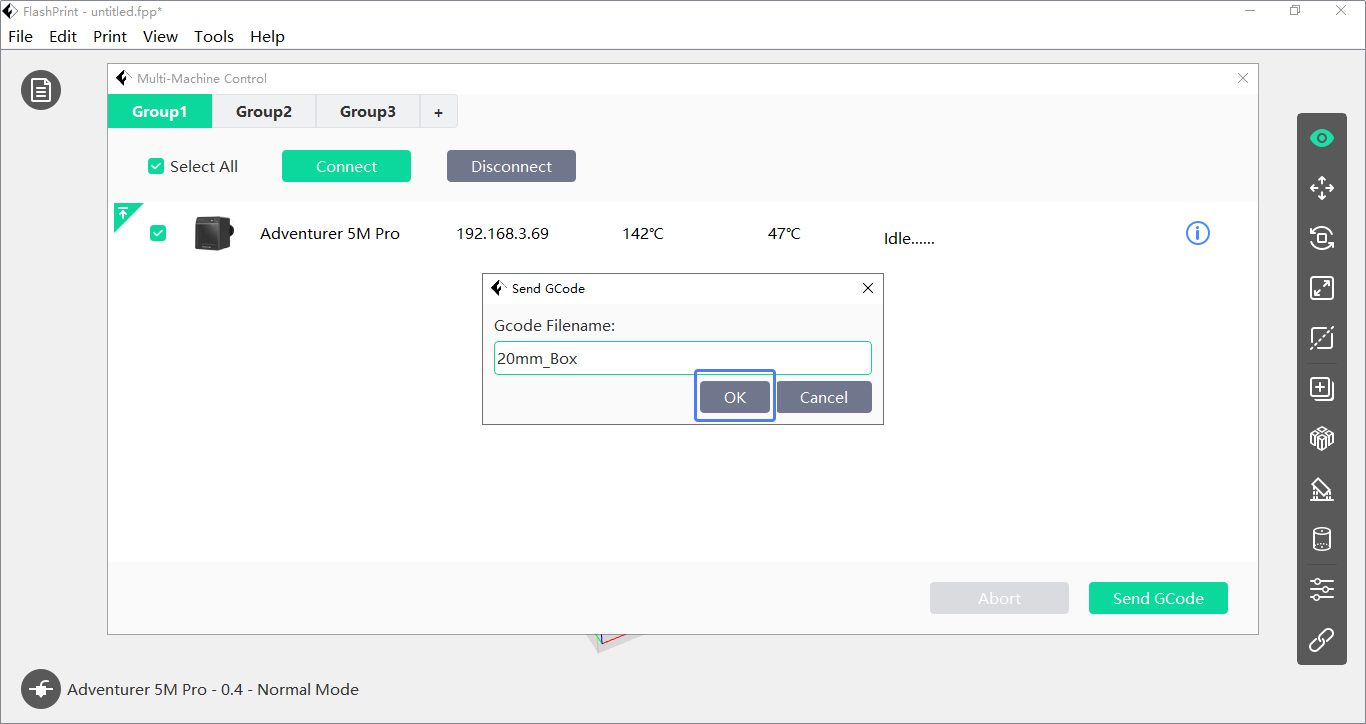
2. Connect FlashPrint 5 to your printer and remotely send the model to the printer for printing (please ensure your computer and printer are connected to the same network).
Updated on 31 Aug 2024

